Setting Up a New Dental Office: Complete Supply Essentials Guide

Opening a new dental practice is one of the most exciting and challenging milestones in a dental professional’s career. Among the hundreds of decisions you will make during the startup process, building your initial supply inventory is one of the most consequential. Order too little and you risk running out mid-procedure during your first weeks of patient care. Order too much and you tie up precious startup capital in products that may expire before you use them.

This guide provides a comprehensive, category-by-category overview of the dental supplies you need to stock before seeing your first patient. It is designed for general dentistry practices but covers enough breadth that specialty practices can use it as a foundation and adjust for their specific procedural needs. Whether you are a new graduate opening your first office or an experienced clinician launching an additional location, this checklist will help you build a complete, practical inventory from day one.

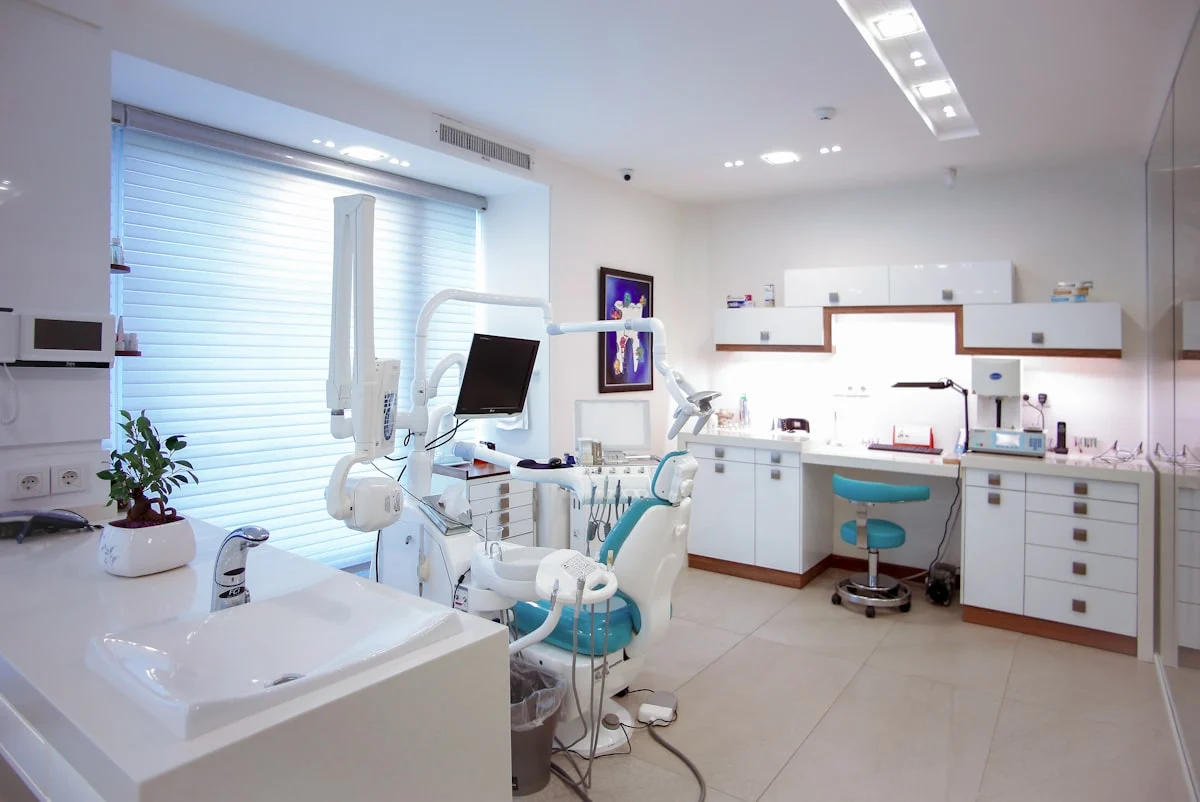
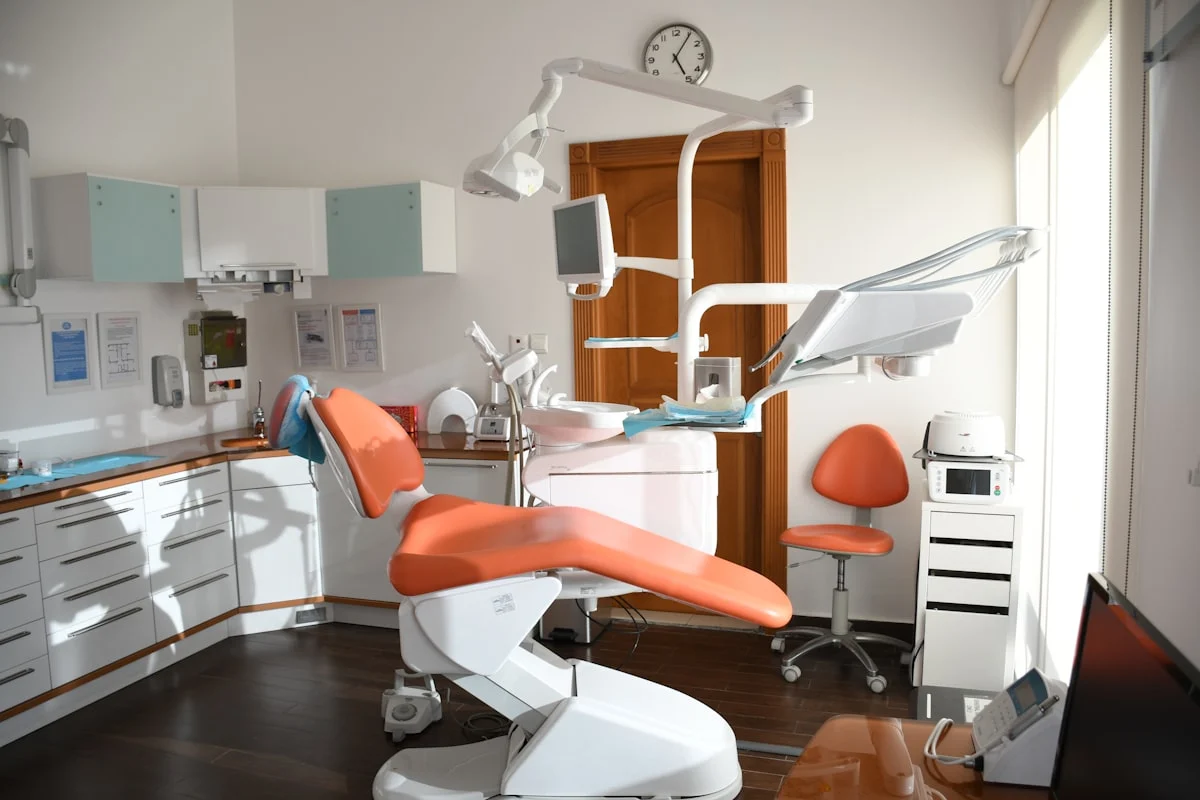
Operatory Essentials: What Every Treatment Room Needs

Each operatory in your practice should be independently equipped with the supplies needed for routine procedures. This ensures that your team is never running between rooms to find basic items during patient care.

Examination and Diagnostic Supplies

  • Mouth mirrors: Stock both front-surface and standard mirrors. Front-surface mirrors provide a clearer, non-doubled image and are preferred for detailed examination work.
  • Explorers: Shepherd’s hook (#23) explorers for caries detection and #17 explorers for checking margins and subgingival calculus.
  • Periodontal probes: Standard Williams probes (1-2-3-5-7-8-9-10mm markings) are the most widely used. Consider color-coded probes for easier reading.
  • Cotton pliers: Also called college pliers, these are used for placing and retrieving cotton pellets, wedges, and other small items in the oral cavity.
  • Articulating paper and holders: Articulating paper or film in multiple thicknesses for occlusal adjustment. Stock both blue (thick) and red (thin) for initial marking and refinement.

Handpieces and Rotary Supplies

Handpieces represent a significant initial investment, but the consumable rotary supplies that go with them are ongoing expenses you need to plan for.

  • High-speed burs: Build a core inventory of FG carbide and diamond burs as outlined in our dental burs buying guide. Start with round burs (#1/4 through #6), pear-shaped (#330, #331), tapered fissure (#169, #170, #171), and a set of medium-grit diamond burs for crown preparation.
  • Slow-speed burs: RA (latch-type) round burs for caries excavation, straight handpiece acrylic burs for laboratory adjustments, and finishing burs for composite polishing.
  • Polishing discs and points: Composite finishing and polishing systems, including disc systems, rubber polishing points, and diamond polishing paste.
  • Prophy angles and cups: Disposable prophy angles for hygiene appointments. Order enough for your projected patient volume in the first month.

Restorative Materials: Building Your Core Inventory

Restorative materials are where clinical preference meets budget reality. You do not need every product on the market, but you do need a thoughtfully selected set that covers the procedures you will perform most frequently.

Composite System

  • Universal composite: Select one high-quality nanohybrid or nanofill composite as your primary material. Stock shades A1, A2, A3, A3.5, and B1 as a starting palette. These five shades will cover the majority of your patients. You can expand your shade range as you identify specific needs.
  • Flowable composite: One or two shades of flowable composite for liners, small restorations, and repair procedures.
  • Bulk-fill composite: If you plan to use a bulk-fill workflow for posterior restorations, stock one shade (typically Universal or A2) to start.
  • Bonding system: A universal adhesive that can be used in total-etch, self-etch, or selective-etch mode provides maximum flexibility while simplifying your inventory.
  • Etchant: 37% phosphoric acid gel in syringe delivery for enamel etching. Several syringes will last a new practice several weeks.

Browse the complete selection at Pixel Dental Supply’s composites and bonding section to build your initial restorative inventory.

Cement and Luting Agents

  • Permanent cement: A resin-modified glass ionomer cement is a versatile choice for cementing crowns, bridges, inlays, and onlays. One or two kits will cover your initial needs.
  • Temporary cement: For provisional restorations during the lab fabrication period. Stock both eugenol-containing and non-eugenol varieties, as eugenol can interfere with the setting of some permanent resin cements.
  • Resin cement: For bonding all-ceramic restorations, veneers, and fiber posts. A dual-cure universal resin cement kit provides the broadest utility.

Impression Materials

  • Alginate: For study models, diagnostic casts, sports guard impressions, and whitening tray fabrication. Alginate is inexpensive and covers a wide range of non-precision impression needs.
  • VPS (vinyl polysiloxane) impression material: For crown and bridge impressions, the standard is a two-viscosity VPS system (heavy body and light body or wash material). Auto-mix cartridges simplify dispensing and reduce waste.
  • Impression trays: Disposable plastic trays in assorted sizes. Stock at least three sizes each for upper and lower arches.
  • Bite registration material: A fast-setting bite registration material for recording occlusal relationships.

Temporary Restoration Materials

  • Bis-acryl provisional material: Auto-mix cartridges for fabricating temporary crowns and bridges. Stock at least one shade (typically A2 or A3).
  • Temporary filling material: For interim restorations between appointments, such as between endodontic visits.
  • Temporary crown forms: Pre-formed polycarbonate or celluloid crown forms in assorted sizes for anterior and posterior teeth.

Disposable Supplies: Stocking for the First Month

Disposable supplies will be your largest recurring expense by volume. For a new practice, estimate your patient volume for the first month and order accordingly, adding a 20 percent buffer for your initial stock.

Infection Control Essentials

  • Examination gloves: Nitrile gloves in all sizes your team needs. Plan for 4-6 gloves per patient visit (including glove changes during procedures).
  • Face masks: ASTM Level 2 masks for routine procedures and ASTM Level 3 for surgical and high-aerosol procedures.
  • Patient bibs: Three-ply bibs with polyethylene backing. One per patient per visit, plus extras for messy procedures.
  • Surface barriers: Headrest covers, light handle covers, syringe sleeves, curing light sleeves, and bracket table covers.
  • Sterilization pouches: Self-sealing pouches in multiple sizes for autoclaving instruments. You will use a surprising number of these daily.
  • Disinfectant wipes and sprays: EPA-registered surface disinfectants for operatory turnover between patients.

The disposables section at Pixel Dental Supply provides everything you need to stock your new practice’s infection control supplies in a single order.

Suction and Isolation

  • Saliva ejectors: Standard saliva ejectors for routine moisture control.
  • HVE tips: High-volume evacuator tips for procedures using high-speed handpieces or ultrasonic scalers.
  • Cotton rolls: Assorted sizes for moisture control. These are consumed in high volume and should be generously stocked.
  • Gauze sponges: 2×2 and 4×4 gauze for hemostasis and debris management.
  • Dry angles: Triangular absorbent pads for isolating the parotid duct during maxillary posterior procedures.
  • Rubber dam kits: Sheets, frames, clamps, and punches for isolation during endodontic and restorative procedures.

Applicators and Mixing Supplies

  • Micro-applicator brushes: Fine and regular sizes for applying bonding agents, etchants, and desensitizers.
  • Mixing tips: Auto-mix tips for impression materials, provisional materials, and cements. These are easy to forget when ordering and frustrating to lack when needed.
  • Mixing pads: Paper mixing pads for cements and other materials that require hand mixing.
  • Dappen dishes: Disposable or reusable dishes for holding small quantities of liquids during procedures.

Preventive and Hygiene Supplies

If your practice includes a hygiene program from day one, you will need a complete set of preventive supplies.

  • Prophy paste: Multiple grits (coarse, medium, fine) in individual-dose cups or rings for infection control compliance.
  • Fluoride products: Fluoride varnish (unit-dose) is the current standard for in-office fluoride application. Stock enough for your projected hygiene patient volume.
  • Sealant materials: Light-cured pit and fissure sealant with etchant and applicators. Sealant placement is common in practices that see pediatric and adolescent patients.
  • Ultrasonic scaler tips: Universal and specialty tips for your ultrasonic scaler unit. Each hygienist will need a set.
  • Hand scaling instruments: A full set of scalers and curettes for each hygienist. Gracey curettes (1/2, 7/8, 11/12, 13/14) and universal scalers (Columbia 13/14, Jacquette) form a standard kit.
  • Patient education materials: Toothbrushes, floss, interdental brushes, and printed instructions for post-procedure home care.

Endodontic Supplies

Even if you plan to refer most endodontic cases, you should be prepared to perform emergency pulpotomies and straightforward single-canal root canals.

  • Endodontic files: Hand files in sizes 06-40 for initial negotiation and smaller canals. If you plan to use rotary files, invest in a system you have trained with and stock the appropriate file sequences.
  • Irrigation supplies: Sodium hypochlorite solution (or pre-diluted endodontic irrigant), irrigation syringes, and side-vented irrigation needles in appropriate gauges.
  • Paper points: Absorbent points sized to match your file system for drying canals before obturation.
  • Gutta percha points: Standard and accessory sizes for obturation. Match your purchase to the file system you are using.
  • Endodontic sealer: A bioceramic or resin-based sealer for root canal obturation.
  • Endodontic ruler and stops: For measuring working length and setting file stops. These small items are essential for accurate instrumentation.

Oral Surgery Supplies

Basic extraction and minor surgical supplies should be available even in a primarily restorative practice.

  • Local anesthetic: Lidocaine 2% with 1:100,000 epinephrine is the most versatile anesthetic for general practice. Stock a secondary agent (such as articaine 4% with 1:100,000 epinephrine or mepivacaine 3% plain) for patients who require alternatives.
  • Anesthetic needles: 27-gauge short and long needles for standard injections. 30-gauge short needles for infiltration and supplemental injections.
  • Anesthetic syringes: Aspirating syringes (reusable, sterilizable). Plan for at least two per operatory.
  • Extraction forceps: A basic set including upper universal (#150), lower universal (#151), upper molar (#53R, #53L or #210H), lower molar (#17), and upper anterior (#1). Expand as your surgical caseload requires.
  • Elevators: Straight elevators (Coupland #1, #2, #3 or equivalent) and curved elevators (#301, #302) for luxation and root tip retrieval.
  • Suture materials: Absorbable and non-absorbable sutures with appropriate needles. Chromic gut 4-0 and silk 3-0 are common starting selections.
  • Hemostatic agents: Gel foam, collagen plugs, or oxidized cellulose for managing post-extraction bleeding.
  • Post-operative supply kits: Gauze packs, printed post-op instruction sheets, and small bags for sending patients home with aftercare supplies.

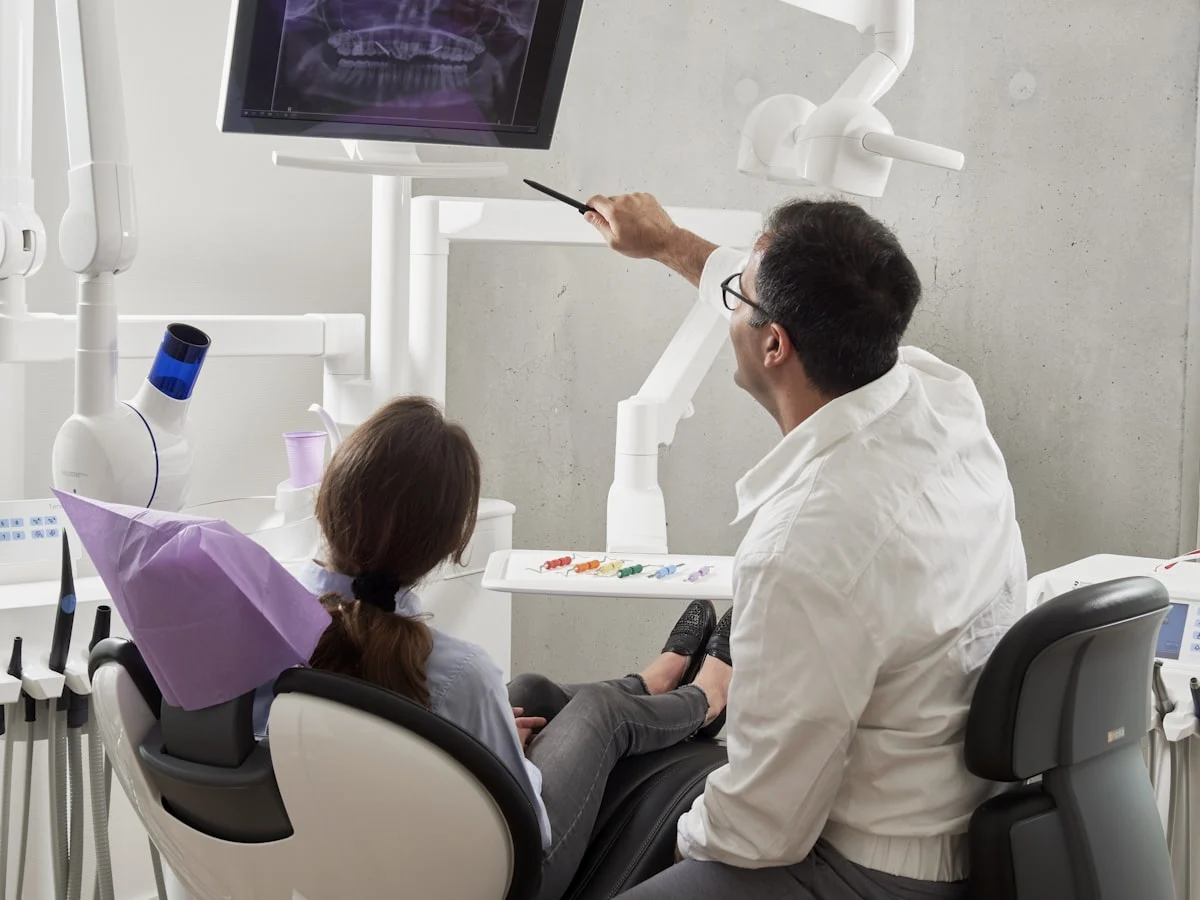
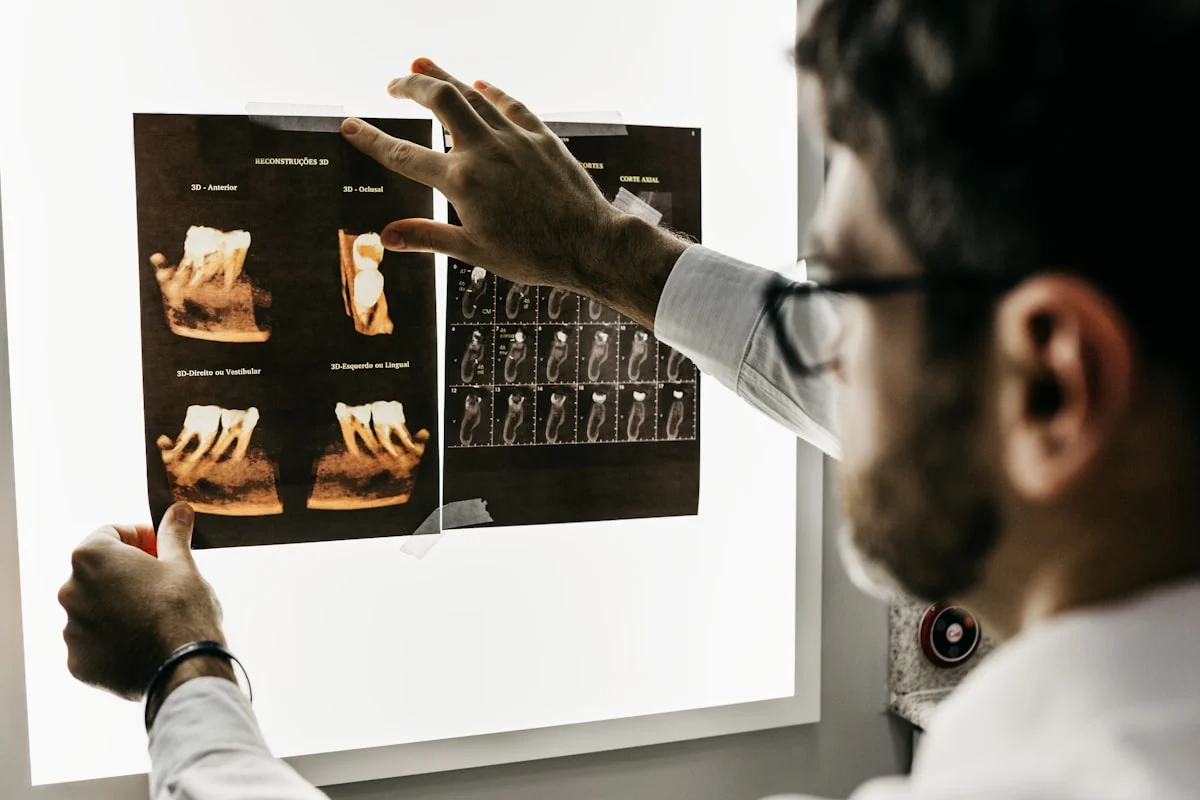
Imaging and Diagnostic Supplies

Your imaging equipment will likely be part of your major equipment purchase, but the consumable supplies need to be stocked separately.

  • Digital sensor barriers: Disposable plastic sleeves for intraoral digital sensors. These are used for every single exposure and are consumed in high volume.
  • Phosphor plate barriers: If you use phosphor plate imaging rather than digital sensors, stock the appropriate protective barriers for each plate size.
  • Positioning devices: Film/sensor holders (such as Rinn XCP or equivalent) for standardized periapical and bitewing radiography. Stock enough sets for each operatory.
  • Lead aprons and thyroid collars: While not disposable, these are essential equipment that should be available and inspected before seeing patients.

Sterilization and Infection Control Infrastructure

Beyond the disposable barriers and PPE covered above, your sterilization center needs its own set of supplies.

  • Sterilization pouches: Multiple sizes to accommodate instruments ranging from single burs to full cassettes.
  • Biological indicators (spore tests): Required for weekly autoclave verification. Many practices use a mail-in spore testing service for independent validation.
  • Chemical indicators: Internal and external chemical indicators verify that sterilization conditions have been met for each load.
  • Enzymatic cleaners: Pre-soak solutions and ultrasonic cleaning solutions for instrument processing.
  • Instrument lubricant: Handpiece lubricant and spray for maintaining high-speed and slow-speed handpieces after sterilization.
  • Sharps containers: Puncture-resistant containers for needles, blades, and other sharps. Mount one in each operatory and the sterilization area.
  • Biohazard waste bags: Red bags for regulated medical waste disposal.

Administrative and Patient-Facing Supplies

Do not forget the non-clinical supplies that keep your front office running and your patients comfortable.

  • Patient forms: Health history forms, consent forms, HIPAA acknowledgment forms, and financial agreement forms. Digital forms are increasingly standard, but keep printed versions available as backup.
  • Appointment cards and business cards: Professional printed materials reinforce your practice identity.
  • Prescription pads: Tamper-resistant prescription pads compliant with your state’s regulations.
  • Recall and follow-up supplies: Whether you use postcards, emails, or text messages, have your recall system configured and stocked before your first patient.
  • Waiting room supplies: Tissues, hand sanitizer, informational brochures about your services, and a comfortable environment that reflects your practice brand.

Budgeting Your Initial Supply Order

For a new general dentistry practice, initial supply costs typically range from $10,000 to $25,000 depending on the scope of services you plan to offer from day one and the volume of patients you expect to see in the first month. Here are some guidelines for managing this investment wisely.

  • Prioritize essentials: Focus your initial order on the supplies needed for the procedures you will perform most frequently in the first 30 days. You can expand your inventory as patient volume grows.
  • Avoid overbuying perishables: Composites, bonding agents, impression materials, and anesthetics all have expiration dates. Purchase enough for your first 60 to 90 days and reorder as needed.
  • Stock generously on consumables: Gloves, masks, bibs, and cotton products are inexpensive individually and frustrating to run out of. Err on the side of overstocking these items.
  • Build relationships with suppliers: Your initial supply order is an opportunity to establish a relationship with a supplier who will support your practice long-term. Choose a partner who offers good pricing, reliable shipping, and responsive customer service.

Your Supply Partner From Day One

Setting up a new dental office is a monumental undertaking, and getting your supply inventory right from the start sets the foundation for smooth operations and excellent patient care. The checklist in this guide covers the essentials, but every practice is unique. As you grow, you will refine your inventory based on your patient base, your clinical preferences, and the procedures that define your practice.

Pixel Dental Supply is here to support your new practice with competitive pricing across every supply category. From rotary instruments and restorative materials to disposable supplies and infection control products, you can build your entire initial inventory from a single trusted source. Visit the shop to explore the full catalog and start stocking your new practice with confidence.

Frequently Asked Questions

How much should I budget for dental supplies when opening a new practice?

Most new general dentistry practices spend between $10,000 and $25,000 on their initial supply inventory, separate from major equipment purchases like chairs, handpieces, and imaging systems. The exact amount depends on the number of operatories you are outfitting, the range of procedures you plan to offer immediately, and the patient volume you expect during your first month. A practical approach is to stock one month of disposable supplies, a core set of restorative materials covering your most common procedures, and basic surgical and endodontic supplies for emergencies. You can expand your inventory in targeted increments as your patient base grows and your procedural mix becomes clearer.

Should I buy top-of-the-line supplies for everything when starting out?

No. A smarter approach is to invest in premium products where quality directly affects clinical outcomes, such as composite materials, bonding agents, and endodontic files, while using quality alternative brands for commodity items like gloves, bibs, cotton rolls, and barriers. This balanced strategy keeps your startup costs manageable while ensuring you have the clinical materials needed to deliver excellent patient care. As your practice grows and cash flow stabilizes, you can evaluate premium options for additional product categories based on your clinical experience and patient feedback.

How do I decide how many operatories to fully stock on day one?

Fully stock every operatory that will be active during your first month of patient care. If you have built out four operatories but plan to use only two initially, you can partially stock the remaining rooms with examination basics and add full procedure supplies as patient volume warrants. However, each active treatment room needs a complete set of instruments, consumable supplies, and small equipment to function independently. Having to shuttle supplies between rooms slows down patient flow and creates opportunities for infection control lapses. The upfront cost of fully stocking each room is repaid many times over in operational efficiency.

What dental supplies do I most commonly run out of in the first few months?

The items that most frequently catch new practice owners off guard are the small consumables that are used in high volume but are individually inexpensive and easy to overlook when ordering. The most common stockout items include mixing tips for impression materials and cements, micro-applicator brushes, anesthetic cartridges and needles, sterilization pouches, surface barrier covers, and specific glove sizes. To prevent stockouts, assign a team member to monitor inventory levels weekly during your first three months and establish reorder points for every consumable item. Once you have three months of usage data, you can set accurate par levels and transition to a more relaxed reordering schedule.

How to Save Money on Dental Supplies Without Sacrificing Quality

Dental supply costs represent one of the largest overhead expenses in any dental practice, typically accounting for 5 to 8 percent of total collections. For a practice collecting one million dollars annually, that translates to $50,000 to $80,000 spent on supplies each year. Even modest improvements in purchasing efficiency can free up thousands of dollars that can be reinvested in equipment upgrades, staff compensation, continuing education, or simply improving your bottom line.

The challenge, of course, is reducing costs without compromising the clinical quality your patients depend on. Cutting corners on materials that directly affect patient outcomes is never acceptable. But the reality is that most dental practices are paying more than they need to for supplies that are equivalent in quality to less expensive alternatives. This guide outlines practical, proven strategies for reducing your dental supply spend while maintaining or even improving the materials and products your practice relies on every day.

Understand Where Your Money Actually Goes

Before you can save money on dental supplies, you need to know exactly what you are spending and where. Many practice owners have a general sense of their supply costs but lack the granular data needed to identify specific savings opportunities.

Conduct a Supply Spend Audit

Pull your supply invoices from the past 12 months and categorize every purchase. Most practices find their spending breaks down into a few major categories:

  • Disposables (35-45% of supply spend): Gloves, masks, bibs, barriers, suction tips, cotton products, and other single-use items. This is typically the largest category by dollar volume.
  • Restorative materials (15-25%): Composites, cements, bonding agents, impression materials, and temporary materials.
  • Rotary instruments (5-10%): Burs, polishing systems, endodontic files, and related consumables.
  • Preventive supplies (5-10%): Prophy paste, fluoride products, sealants, and hygiene instruments.
  • Administrative and miscellaneous (10-20%): Paper products, sterilization supplies, imaging supplies, and other operational items.

Once you see where the money is going, you can prioritize your cost-reduction efforts on the categories with the largest impact.

Calculate Your Supply-to-Collection Ratio

Divide your total annual supply cost by your total annual collections. If the result is above 6 percent, there is almost certainly room for improvement. Practices that actively manage their supply costs often achieve ratios of 4.5 to 5.5 percent without compromising quality. This single metric gives you a clear benchmark to track your progress over time.

Switch to High-Quality Alternative Brands

One of the most impactful strategies for reducing supply costs is evaluating alternative brands for the products you use most frequently. The dental supply market includes many manufacturers who produce products that are functionally equivalent to premium name brands at a significantly lower price point.

Why Premium Brands Cost More

Name-brand dental products carry higher prices for several reasons, not all of which relate to product quality:

  • Marketing and brand recognition: Major brands invest heavily in advertising, sponsorships, and trade show presence. These costs are passed on to purchasers.
  • Sales representative infrastructure: Traditional dental supply companies employ large field sales forces whose salaries, commissions, and travel expenses are built into product pricing.
  • Distribution layers: Products that pass through multiple distribution intermediaries accumulate markups at each stage.
  • Legacy pricing: Some products maintain premium pricing simply because the market has historically accepted it, not because the manufacturing cost justifies the retail price.

How to Evaluate Alternatives Safely

Switching brands requires a thoughtful evaluation process to ensure you are not trading cost savings for clinical problems.

  • Start with commodity products: Disposable supplies like gloves, bibs, cotton rolls, and gauze are largely standardized. Switching to a quality alternative brand for these items carries minimal clinical risk and can yield immediate savings of 20 to 40 percent.
  • Request samples before committing: Any reputable supplier will provide samples of their products for clinical evaluation. Test alternatives on real cases before placing a bulk order.
  • Compare specifications, not just price: Verify that alternative products meet the same regulatory standards and performance specifications as the brands you currently use. For example, ensure that alternative gloves meet the same ASTM testing standards as your current brand.
  • Evaluate on a trial basis: Order a small quantity and use it for two to four weeks before making a permanent switch. This gives your clinical team time to assess handling, performance, and any issues that may not be apparent on first use.
  • Get team feedback: Your assistants and hygienists are the primary users of most disposable supplies. Their input on quality and usability is essential for a successful transition.

Buy in Bulk Strategically

Bulk purchasing is one of the simplest ways to reduce per-unit costs, but it must be done strategically to avoid creating other problems.

What to Buy in Bulk

  • High-consumption disposables: Gloves, masks, and bibs are used in predictable quantities and have long shelf lives, making them ideal for bulk purchasing.
  • Standardized consumables: Items like cotton rolls, gauze, saliva ejectors, and HVE tips do not change frequently and can be safely stocked in larger quantities.
  • Rotary instruments: If you have standardized your bur selection, buying multi-packs or bulk boxes can reduce your per-bur cost by 30 percent or more.

What to Avoid Buying in Bulk

  • Short-shelf-life materials: Composites, bonding agents, and impression materials have limited shelf lives. Buying more than you can use before expiration wastes money rather than saving it.
  • Products you are still evaluating: Never bulk-purchase a product you have not thoroughly tested in your practice. The per-unit savings are meaningless if the product does not meet your clinical standards.
  • Infrequently used items: Specialty supplies used only occasionally are better purchased in smaller quantities to avoid tying up capital and storage space.

Storage Considerations

Bulk purchasing only saves money if you have adequate storage. Overstocked supply closets lead to disorganization, expired products, and difficulty tracking inventory. Ensure you have clean, climate-controlled storage space before committing to large orders.

Order Online From Specialized Dental Suppliers

The traditional dental supply model, in which a sales representative visits your office to take orders from a print catalog, is expensive for both the supplier and the practice. Online dental supply retailers have fundamentally disrupted this model by offering lower prices, broader selection, and greater convenience.

Why Online Dental Suppliers Save You Money

  • Lower overhead: Without the expense of field sales forces, showrooms, and regional distribution centers, online suppliers can pass significant savings on to customers.
  • Transparent pricing: Online pricing is visible to all customers, eliminating the opaque negotiation process that characterizes traditional dental supply purchasing. You can compare prices instantly across products and categories.
  • Easy price comparison: With multiple online suppliers just a few clicks apart, competitive pressure keeps prices lower than what a single-source sales representative typically offers.
  • Order anytime: Place orders when it is convenient for you, whether that is during lunch, after hours, or between patients. No need to wait for a rep visit or play phone tag with a customer service department.

Pixel Dental Supply exemplifies this model, offering competitive pricing on a curated selection of dental supplies with the convenience of online ordering and direct-to-practice shipping.

Negotiate and Leverage Your Purchasing Power

Whether you order online or through a traditional supplier, there are strategies for securing better pricing.

Consolidate Your Purchasing

Spreading your purchases across five or six different suppliers means none of them sees enough volume from your practice to offer meaningful discounts. By consolidating the majority of your purchasing with one or two primary suppliers, you become a more valuable customer and gain leverage for better pricing. Aim to direct at least 70 to 80 percent of your supply spend through your primary supplier.

Ask About Volume Discounts

Many suppliers offer tiered pricing based on order volume. Ask directly about discount thresholds and plan your ordering schedule to meet them. Sometimes slightly accelerating an order to include a few extra items is enough to cross a pricing threshold that more than pays for the additional items.

Time Your Purchases

Dental supply companies frequently run promotions tied to trade shows, end-of-quarter sales targets, and holiday seasons. If you can anticipate your needs and stock up during promotional periods, the savings can be substantial. Sign up for email notifications from your primary suppliers to stay informed about upcoming sales.

Join a Buying Group

Dental buying groups aggregate the purchasing power of multiple independent practices to negotiate volume pricing that individual practices could not achieve alone. Membership fees are typically modest compared to the savings generated. Investigate the buying groups available in your area or specialty and compare the discounts they have negotiated with your current pricing.

Reduce Waste and Optimize Usage

Saving money on supplies is not just about paying less per unit. It is also about using fewer units by eliminating waste.

Standardize Your Operatory Setup

When every operatory is set up differently, or when different clinicians use different products for the same procedure, you end up stocking more products than necessary and increasing waste from expired or unused materials. Standardize your procedure trays and supply lists so that every operatory uses the same products in the same configuration. This simplifies ordering, reduces inventory variety, and ensures that all products are consumed before they expire.

Implement Procedure-Based Supply Kits

Pre-assembled supply kits for common procedures (composite restoration, crown prep, extraction, etc.) prevent over-dispensing by including exactly the items needed for each procedure. Kits can be assembled by your team or purchased pre-packaged from suppliers. Either way, they reduce per-procedure waste by eliminating the habit of grabbing “a few extra, just in case.”

Track Expiration Dates Systematically

Expired dental supplies represent pure waste. Implement a first-in, first-out (FIFO) storage system where newer items are placed behind older ones. Conduct monthly expiration date checks and flag any items approaching their expiration. If a product consistently expires before you use it, reduce your order quantity or switch to a smaller package size.

Monitor Per-Procedure Supply Costs

Calculate the supply cost for your most common procedures and track it over time. If your per-procedure composite cost suddenly increases, investigate whether the team is using more material than necessary, if there is waste during dispensing, or if the material price has increased. This granular tracking reveals cost trends that aggregate numbers may hide.

Invest in Quality Where It Matters Most

Cost reduction should never come at the expense of clinical outcomes. Some products warrant premium pricing because the difference in quality directly affects patient results.

  • Restorative materials for visible anterior teeth: The composite you use for a Class IV on a central incisor needs to deliver exceptional esthetics and polishability. This is not the place to switch to a budget alternative without thorough testing.
  • Bonding agents: The adhesive system is the foundation of every bonded restoration. A reliable bonding agent that you know well and trust is worth a premium over an untested budget alternative.
  • Endodontic files: The safety implications of rotary file fracture make this a category where quality should never be compromised for cost savings.
  • Impression materials for complex cases: When accuracy is critical, such as full-arch implant impressions, use the best impression material available regardless of cost.

The key is to save aggressively on commodity items so you have the budget to invest in premium products where quality makes a clinical difference.

Use Technology to Manage Costs

Modern practice management tools can help you maintain visibility into your supply spending and identify opportunities for improvement.

  • Inventory management software: Dedicated dental inventory systems track stock levels, reorder points, usage rates, and spending by category. They can generate reorder alerts and spending reports that make cost management more systematic.
  • Practice management reports: Most practice management systems can generate reports on supply expenses relative to production and collections. Review these reports monthly to catch spending trends early.
  • Spreadsheet tracking: If dedicated software is beyond your budget, a well-organized spreadsheet that logs monthly supply purchases by category is a simple and effective alternative. The key is consistent tracking over time.

Start Saving Today Without Sacrificing Quality

Reducing your dental supply costs is not a one-time project but an ongoing practice management discipline. The practices that achieve the best results combine multiple strategies: switching to quality alternative brands for commodity items, buying in bulk where it makes sense, consolidating purchasing with a reliable online supplier, reducing waste through standardization, and investing selectively in premium products where clinical quality demands it.

Pixel Dental Supply was built to help dental practices achieve exactly this balance. With competitive pricing on a curated selection of supplies, transparent online ordering, and a commitment to stocking products that meet professional standards, Pixel Dental Supply makes it easy to reduce your supply costs without compromising the quality of care your patients expect. Browse the full catalog today and see how much your practice could save.

Frequently Asked Questions

What percentage of revenue should a dental practice spend on supplies?

The generally accepted benchmark for dental supply costs is 5 to 6 percent of total collections for a well-managed general practice. Practices spending above 7 percent should investigate their purchasing patterns for savings opportunities. Specialty practices may have different benchmarks depending on the procedures they perform. Oral surgery practices, for example, may have higher supply costs due to implant components and surgical supplies, while orthodontic practices may have lower consumable costs but significant expenditure on brackets, wires, and appliances. The important thing is to know your number, track it consistently, and work toward improvement.

Is it worth switching from my current dental supplier to save money?

In most cases, yes. Many practices stay with a single supplier out of habit or a personal relationship with a sales representative rather than because that supplier offers the best value. Request a price comparison on your top 20 most-purchased items between your current supplier and one or two alternatives. If the difference is more than 10 to 15 percent on commodity items, the switch is likely worthwhile. However, switching costs are real: you will spend time setting up a new account, learning a new ordering system, and evaluating new product lines. Choose a new supplier whose catalog, pricing structure, and ordering process align with your practice’s needs before committing.

How can I convince my team to accept alternative brand products?

Resistance to brand changes is common and understandable. Clinicians develop muscle memory and confidence with familiar products. The most effective approach is to involve the team in the evaluation process rather than making unilateral switches. Present the cost-saving rationale transparently, provide samples for hands-on testing, collect feedback after a defined trial period, and make the final decision collaboratively. When team members participate in the evaluation, they are far more likely to accept the change. Also, start with low-risk items like gloves or bibs before tackling clinical materials like composites or bonding agents.

Are dental buying groups worth joining?

For most independent practices, dental buying groups offer meaningful savings, particularly on high-volume disposable items. The typical savings range from 10 to 30 percent on contracted products, which can easily exceed the annual membership fee within the first few orders. However, buying groups vary widely in their negotiated discounts, product selection, and membership requirements. Before joining, compare the group’s contracted prices against your current pricing on the specific products you purchase most. Also consider whether the group restricts your ability to purchase from other suppliers, as flexibility may be more valuable than the discount on some items.

Essential Disposable Dental Supplies Checklist for Your Practice

Disposable dental supplies are the backbone of infection control and daily clinical operations in every dental practice. While they may not receive the same attention as high-tech equipment or premium restorative materials, these single-use items directly affect patient safety, regulatory compliance, staff efficiency, and your practice’s professional image. Running out of a critical disposable mid-procedure is not just inconvenient; it can compromise infection control protocols and disrupt your entire schedule.

This comprehensive checklist covers every category of disposable dental supplies your practice needs to stay fully stocked, compliant, and operationally smooth. Use it as a reference when building your inventory system, onboarding a new office manager, or evaluating your current supply chain for gaps.

Personal Protective Equipment (PPE)

PPE is the first line of defense for your clinical team and a non-negotiable requirement under OSHA and CDC guidelines. Every team member who enters the treatment area during patient care must be properly equipped.

Examination Gloves

Gloves are the most frequently used disposable item in any dental practice. You will go through thousands per month, so quality, fit, and cost all matter.

  • Nitrile gloves are the current standard for dental practice. They offer excellent puncture resistance, chemical compatibility, and are latex-free, eliminating the risk of latex allergies in both patients and staff.
  • Sizing matters: Stock a full range of sizes (XS through XL) to ensure every team member has properly fitting gloves. Ill-fitting gloves reduce tactile sensitivity and increase hand fatigue.
  • Powder-free is mandatory: The FDA banned powdered surgical and examination gloves in 2017. Ensure all gloves in your practice are powder-free to comply with regulations.
  • Consider textured fingertips: Textured gloves improve grip on instruments, especially in wet environments. This small feature can make a meaningful difference during lengthy procedures.

Face Masks

Dental procedures generate significant aerosols and splatter. ASTM-rated face masks are essential for every clinical team member.

  • ASTM Level 1: Suitable for examinations and non-aerosol-generating procedures with low fluid exposure risk.
  • ASTM Level 2: Appropriate for most restorative procedures with moderate aerosol generation and fluid exposure.
  • ASTM Level 3: Required for procedures with high aerosol generation and heavy fluid exposure, such as surgical extractions, ultrasonic scaling, and implant placement.
  • Earloop vs. tie-back: Earloop masks are convenient for quick donning and removal. Tie-back masks provide a more secure, customizable fit for longer procedures.

Face Shields and Protective Eyewear

Masks alone do not protect the eyes. Disposable face shields or reusable protective eyewear with disposable shields should be available at every treatment station. Full-coverage face shields are especially valuable during high-splatter procedures and have become increasingly standard since heightened infection control awareness.

Isolation Gowns and Lab Coats

Disposable isolation gowns protect clinical attire during procedures with significant splatter potential. For daily wear, reusable lab coats that are laundered in-office or by a service are more practical, but disposable gowns should be readily available for surgical procedures and high-risk situations.

Head Covers and Shoe Covers

Though not required for routine dental procedures in most jurisdictions, disposable head covers and shoe covers are advisable during surgical procedures and are required in some implant surgery protocols. Keep a supply available even if daily use is not your standard protocol.

Patient Bibs and Drapes

Patient bibs serve the dual purpose of protecting the patient’s clothing and providing a clean work surface. They are one of the most visible disposable items in your practice, so quality matters for patient perception.

  • Standard 2-ply and 3-ply bibs: Three-ply bibs (tissue-tissue-poly) offer better fluid resistance than two-ply options. The polyethylene backing prevents fluid strike-through to the patient’s clothing.
  • Color options: Bibs are available in a wide range of colors. Choosing a color that matches your practice branding is a subtle but effective way to reinforce your office’s professional identity.
  • Chain-style and adhesive bib holders: Disposable adhesive bib holders eliminate the need for reusable alligator clips, improving infection control. If you use reusable clips, they must be sterilized between patients.

Suction and Evacuation Supplies

Consistent suction is critical for patient comfort and clinical visibility during procedures. These disposable components must be readily stocked.

Saliva Ejectors

Standard saliva ejectors are used during routine procedures and examinations. Stock both clear and opaque varieties based on clinician preference. Ensure you are using ejectors with smooth, non-irritating tips that are comfortable for patients during longer procedures.

High-Volume Evacuator (HVE) Tips

HVE tips are essential for managing water spray and aerosols during handpiece use, ultrasonic scaling, and other procedures that generate significant fluid. Vented and non-vented options are available; vented tips reduce the risk of soft tissue trauma from excessive suction.

Surgical Suction Tips

For oral surgery and implant procedures, specialized surgical suction tips provide precise aspiration in confined surgical sites. Stock these separately from your routine evacuation supplies to ensure availability when needed.

Barrier Protection Products

Surface barriers are a critical component of infection control that prevent contamination of frequently touched surfaces in the operatory.

  • Headrest covers: Disposable headrest covers are placed fresh for every patient and removed as part of operatory turnover.
  • Light handle covers: Overhead light handles are touched with contaminated gloves during procedures. Disposable sleeves or bag-style covers prevent cross-contamination.
  • Curing light sleeves: Single-use sleeves for curing lights protect the device from contamination while maintaining light transmission.
  • Syringe sleeves: Air-water syringe covers prevent contamination of the syringe body, which is otherwise difficult to clean and sterilize between patients.
  • X-ray sensor barriers: Digital sensor covers protect expensive intraoral sensors from damage and contamination. Use a fresh barrier for every exposure.
  • Bracket table covers: Full-coverage plastic-backed covers for bracket tables simplify cleanup and provide a consistently clean work surface.
  • Computer keyboard and mouse covers: If operatory computers are accessed during treatment, disposable keyboard and mouse covers are essential for infection control.

Maintaining a reliable supply of barrier products is one of the easiest and most cost-effective ways to strengthen your infection control program. Pixel Dental Supply’s disposables category offers a full range of barrier products to keep your operatories protected.

Impression and Retraction Supplies

Even as digital impression technology advances, many practices still rely on conventional impression materials and associated disposables for at least some procedures.

  • Impression trays: Disposable plastic impression trays eliminate the need for sterilization and reduce cross-contamination risk. Stock a variety of sizes for upper and lower arches in both full-arch and quadrant configurations.
  • Mixing tips: Auto-mix cartridge systems for impression materials and provisional materials require fresh mixing tips for each use. These small but essential items are easy to overlook when reordering.
  • Retraction cord: While retraction cord itself is not reusable, associated items like hemostatic agents and cord-packing instruments may have both disposable and reusable options. Ensure disposable hemostatic applicators are available.
  • Bite registration trays and materials: Disposable bite trays and single-use bite registration syringes simplify the workflow for crown and bridge impressions.

Preventive and Hygiene Disposables

The hygiene department consumes a significant volume of disposable supplies. Keeping this area well stocked is essential for maintaining appointment flow.

  • Prophy angles: Disposable prophy angles with pre-attached cups or brushes are the standard for prophylaxis procedures. They eliminate the need to sterilize reusable prophy angles while providing consistent performance.
  • Prophy paste: Individual-dose cups of prophy paste improve infection control by eliminating multi-patient containers. Various grits (coarse, medium, fine) should be available based on patient needs.
  • Fluoride trays: Disposable foam or plastic fluoride trays in assorted sizes accommodate different arch forms and patient ages.
  • Fluoride varnish: Unit-dose fluoride varnish applications have become the preferred delivery method in many practices. Each packet contains a single-patient dose with an applicator brush.
  • Dental sealant supplies: Sealant applicator tips, micro-applicators, and etchant syringes are all single-use items that support the sealant workflow.

Endodontic Disposables

Root canal procedures require a specific set of disposable supplies that should be organized and readily accessible.

  • Endodontic irrigation needles: Side-vented irrigation needles in various gauges (typically 27-30 gauge) are single-use items essential for safe and effective canal irrigation.
  • Paper points: Absorbent paper points for drying canals are sized to match the corresponding file sizes used during instrumentation.
  • Cotton pellets: Sterile cotton pellets are used for medication placement and temporary restoration of access cavities between appointments.
  • Rubber dam supplies: Disposable rubber dam sheets, frames, and clamps (where applicable) support the isolation protocol that is standard for endodontic procedures.

Miscellaneous but Critical Disposables

Some disposable items do not fit neatly into the categories above but are equally important for daily operations.

  • Micro-applicator brushes: These small, disposable brushes are used for applying bonding agents, etchants, desensitizers, and other materials. Stock them in regular and fine-tip sizes.
  • Cotton rolls: A staple for moisture control during restorative procedures. Available in various sizes for different applications.
  • Gauze sponges: Standard 2×2 and 4×4 gauze sponges are used for hemostasis, debris removal, and patient instructions following extractions.
  • Articulating paper holders: Disposable holders for articulating paper or film simplify occlusal marking and eliminate another item from the sterilization workflow.
  • Cement and adhesive applicator tips: Single-use tips for dual-barrel cement cartridges and adhesive delivery systems.
  • Temporary crown materials: Bis-acryl cartridges with disposable mixing tips for fabricating provisional restorations.
  • Dental wipes: Disinfectant wipes for operatory surfaces between patients. Choose EPA-registered products effective against the pathogens relevant to dentistry.

Building an Effective Disposable Supply Management System

Having the right disposables on hand requires more than a long shopping list. You need a system for maintaining inventory levels without overstocking or running out.

Establish Par Levels

For each disposable item, determine the quantity you need to keep on hand based on your average usage rate and your supplier’s delivery time. A common approach is to set a par level at two weeks of supply, with a reorder point at one week. This provides a buffer against delivery delays without tying up excessive capital in inventory.

Assign Inventory Responsibility

Designate a specific team member (typically a dental assistant or office manager) as the inventory coordinator. This person should conduct regular inventory counts, place orders, and manage the storage area. Clear accountability prevents the “I thought someone else ordered it” scenario that leads to stockouts.

Consolidate Your Suppliers

While it may be tempting to chase the lowest price on each individual item, working with fewer suppliers simplifies ordering, reduces shipping costs, and may qualify your practice for volume discounts. A single, reliable supplier for the majority of your disposables can save significant time and administrative effort.

Set Up Automatic Reordering

Many online dental supply retailers offer subscription or auto-reorder options for frequently consumed items. This is especially useful for high-volume disposables like gloves, masks, and bibs that you use at a predictable rate. Automated reordering eliminates the risk of forgetting to place an order during busy weeks.

Stock Your Practice With Confidence

Disposable dental supplies may be individually inexpensive, but they collectively represent a significant line item in your practice budget and a critical component of your infection control program. A well-managed disposable supply system ensures that your team can focus on patient care rather than searching for missing supplies or improvising with inadequate substitutes.

Visit Pixel Dental Supply’s disposables section to browse a comprehensive selection of gloves, masks, bibs, barriers, suction tips, and every other single-use item your practice needs. With competitive pricing, reliable shipping, and a catalog designed for dental professionals, Pixel Dental Supply makes it easy to keep your practice fully stocked without overpaying. Order today and experience the convenience of a dental supply partner that understands the demands of a busy clinical environment.

Frequently Asked Questions

How often should I audit my disposable dental supply inventory?

A full inventory audit should be conducted at least monthly, with weekly spot checks on high-consumption items like gloves, masks, and suction tips. During the monthly audit, verify that all items are within their expiration dates, par levels are still appropriate for your patient volume, and storage conditions are adequate. Some practices find that a simple spreadsheet or inventory management app is sufficient for tracking, while larger multi-location practices may benefit from dedicated inventory management software.

Are generic or store-brand disposable supplies safe to use?

Yes, provided they meet the relevant regulatory standards. Examination gloves must meet FDA standards regardless of brand. ASTM-rated face masks must pass standardized filtration and fluid resistance testing. The key is to verify that any product you purchase, regardless of brand name, carries the appropriate regulatory certifications. Many private-label and alternative-brand disposables are manufactured in the same facilities as premium brands and offer identical performance at a lower price point. Purchasing from a reputable dental supply company like Pixel Dental Supply ensures that even budget-friendly options meet professional standards.

What is the shelf life of common disposable dental supplies?

Shelf life varies by product category. Nitrile gloves typically have a shelf life of 3 to 5 years when stored in a cool, dry environment away from direct sunlight. Face masks generally maintain their filtration properties for 3 to 5 years. Patient bibs and barrier products do not degrade significantly over time if kept in intact packaging. Impression materials and dental cements have more limited shelf lives, typically 1 to 3 years, and should be rotated on a first-in, first-out basis. Always check manufacturer-specific expiration dates and discard expired products, even if they appear visually intact.

How can I reduce waste from disposable dental supplies?

While disposable supplies are inherently single-use, you can reduce overall waste by right-sizing your orders to minimize expired product, using products with recyclable packaging where available, and working with suppliers who offer environmentally conscious product options. Some disposable items, such as nitrile gloves, are now available in thinner formulations that use less material per unit without sacrificing protection. Additionally, choosing barrier products sized appropriately for their intended surface avoids waste from oversized covers. However, never compromise infection control standards in the interest of reducing waste; patient and staff safety must remain the top priority.

Dental Composite Materials: Types, Uses, and How to Choose

Dental composites have become the material of choice for direct restorations in modern dentistry. Their ability to bond to tooth structure, match natural tooth color, and deliver durable long-term results has made them essential in virtually every general practice. However, the sheer variety of composite products on the market can make selection genuinely difficult, especially for newer clinicians building their material inventory for the first time.

This guide provides a thorough overview of dental composite materials, including the different resin types, filler technologies, curing considerations, and shade-matching strategies that affect clinical outcomes. Whether you are evaluating a new composite for your practice or simply want to deepen your understanding of the materials you already use, this article will give you the knowledge to make confident purchasing decisions.

What Are Dental Composites Made Of?

All dental composites share three fundamental components, though the specific formulations vary significantly between products.

  • Resin matrix: The organic polymer base, typically Bis-GMA (bisphenol A-glycidyl methacrylate), UDMA (urethane dimethacrylate), or TEGDMA (triethylene glycol dimethacrylate). The resin matrix determines the handling characteristics, viscosity, and polymerization behavior of the composite.
  • Filler particles: Inorganic particles such as silica, quartz, zirconia, or glass that provide strength, wear resistance, and radiopacity. Filler size, shape, and loading percentage are the primary factors that distinguish one composite category from another.
  • Coupling agent: A silane compound that chemically bonds the filler particles to the resin matrix. The effectiveness of this bond directly influences the composite’s mechanical properties and longevity.

Understanding these components helps explain why composites in the same category can perform differently: the specific resin chemistry, filler technology, and coupling mechanism all influence handling, strength, polishability, and esthetics.

Types of Dental Composites by Filler Technology

Dental composites are primarily classified by the size and type of their filler particles. Each category offers a different balance of strength, esthetics, and handling properties.

Nanofill Composites

Nanofill composites use filler particles in the nanometer range (typically 5-100nm), often assembled into nanoclusters. This technology represents the current state of the art in composite design.

  • Superior polishability: The tiny filler particles allow nanofills to achieve an exceptionally smooth, glossy surface that resists staining and maintains its luster over time.
  • Excellent esthetics: Nanofills handle light in a way that closely mimics natural tooth structure, making them ideal for anterior restorations where appearance is paramount.
  • Good strength: Despite their fine particle size, modern nanofills achieve mechanical properties comparable to hybrid composites, making them suitable for both anterior and posterior applications.
  • Universal application: Many clinicians use nanofill composites as their primary material for all direct restorations, simplifying inventory management.

Nanohybrid Composites

Nanohybrid composites combine nano-sized fillers with larger conventional particles. This blended approach aims to capture the polishability of nanofills with the strength characteristics of traditional hybrid composites.

  • Broad versatility: Nanohybrids are arguably the most versatile composite category, performing well in both anterior and posterior applications.
  • Predictable handling: Most nanohybrids offer excellent sculptability and adaptation to cavity walls, with minimal slumping in Class II preparations.
  • Strong mechanical properties: The larger filler particles contribute to high compressive and flexural strength, supporting long-term durability under occlusal loads.
  • Good polish retention: While not quite matching the polish of pure nanofills, nanohybrids maintain a clinically acceptable surface smoothness for extended periods.

Microfill Composites

Microfill composites use colloidal silica fillers in the 0.01-0.1 micrometer range. They were developed primarily for esthetic anterior restorations and remain useful in specific clinical situations.

  • Outstanding polish: Microfills achieve the smoothest surface of any composite category and maintain that polish exceptionally well over time.
  • Natural translucency: Their optical properties make them excellent for mimicking the translucent incisal edges of anterior teeth.
  • Lower strength: Microfills have lower filler loading and consequently lower compressive and flexural strength, making them less suitable for stress-bearing posterior restorations.
  • Niche applications: Today, microfills are primarily used for Class V restorations, facial veneers, and layering techniques where their esthetic properties are most advantageous.

Bulk-Fill Composites

Bulk-fill composites are engineered to be placed in increments of 4-5mm rather than the traditional 2mm maximum. They have gained significant popularity for their potential to reduce chair time in posterior restorations.

  • Reduced layering: By allowing thicker increments, bulk-fills can cut the number of placement and curing cycles required for deep posterior restorations.
  • Lower polymerization stress: Most bulk-fill formulations use modified resin chemistry to reduce shrinkage stress, even with larger increment sizes.
  • Enhanced depth of cure: Increased translucency and photoinitiator modifications allow light to penetrate deeper into the material, ensuring adequate polymerization throughout the increment.
  • Available in flowable and sculptable: Some bulk-fill systems use a flowable base capped with a sculptable composite, while others offer a single sculptable material for the entire restoration.

Flowable Composites

Flowable composites have a lower filler loading and higher resin content than packable materials, giving them a fluid consistency that is dispensed through a syringe tip.

  • Excellent adaptation: The low viscosity allows flowables to intimately adapt to irregular cavity walls and reach undercuts that packable composites may not penetrate.
  • Useful as a liner: Many clinicians place a thin layer of flowable composite as the first increment in a cavity preparation to reduce void formation at the tooth-restoration interface.
  • Lower mechanical properties: Reduced filler content means lower strength and wear resistance compared to packable composites.
  • Ideal for small restorations: Flowables are excellent for preventive resin restorations, small Class I repairs, and cervical abfraction lesions.

Understanding Composite Curing: Light, Time, and Depth

Proper curing is arguably the most important factor in composite restoration success. An inadequately cured composite will exhibit reduced strength, increased wear, greater susceptibility to staining, and higher risk of secondary caries at the margins.

Light Curing Basics

Most dental composites are light-cured using photoinitiators that respond to specific wavelengths of visible light. The standard photoinitiator, camphorquinone, absorbs light in the 450-490nm range, which corresponds to the blue light produced by LED curing units. Some newer composites use alternative photoinitiators that may require broader-spectrum curing lights.

Critical Curing Parameters

  • Irradiance (power density): Measured in mW/cm2, this describes the intensity of the curing light. Most composites require a minimum irradiance of 400-600 mW/cm2 for adequate curing, though higher-powered lights (1000+ mW/cm2) can reduce curing time.
  • Exposure time: Standard recommendations range from 10 to 40 seconds per increment, depending on the composite, shade, and curing light intensity. Darker shades generally require longer curing times because pigments absorb and scatter the curing light.
  • Depth of cure: Traditional composites should be placed in 2mm increments to ensure complete polymerization throughout the material. Bulk-fill composites extend this to 4-5mm, but always verify the manufacturer’s specific recommendations.
  • Distance from the composite surface: Light intensity decreases rapidly with distance. Keep the curing tip as close to the composite surface as possible, ideally within 1mm. Every millimeter of additional distance significantly reduces the energy reaching the deeper portions of the material.

Curing Light Maintenance

A curing light is only as effective as its current output. Regularly test your curing light with a radiometer to verify that it is delivering adequate power. Replace barrier sleeves between patients, keep the light tip free of cured composite debris, and replace the unit when output consistently falls below the manufacturer’s specified minimum.

Shade Selection: The Art and Science of Color Matching

Even a perfectly placed and polished composite restoration will fail esthetically if the shade does not match the surrounding tooth structure. Effective shade matching combines systematic technique with an understanding of how composites interact with light.

The Three Dimensions of Shade

  • Hue: The basic color family (yellow, yellow-red, gray). In the VITA shade system, this corresponds to the letter designation (A, B, C, D).
  • Value: The lightness or darkness of the shade. Value is often considered the most important dimension because the human eye perceives value differences more readily than hue differences. Getting the value right will make even a slight hue mismatch far less noticeable.
  • Chroma: The saturation or intensity of the color. In the VITA system, this corresponds to the number (1 = low chroma, 4 = high chroma). Chroma typically increases toward the cervical area of a tooth and decreases toward the incisal edge.

Practical Shade-Matching Tips

  • Match shade before rubber dam placement: Dehydrated teeth appear lighter than their actual shade. Take your shade reading at the beginning of the appointment while the tooth is still hydrated.
  • Use natural lighting when possible: Operatory lights can introduce color bias. Position the patient near a window or use a color-corrected light source for shade selection.
  • Take a quick first impression: Color fatigue sets in rapidly. Make your initial shade determination within 5-7 seconds, then look away at a neutral gray or blue surface to reset your color perception before confirming.
  • Consider opacity and translucency: Some composite systems offer dentin (opaque) and enamel (translucent) shades for layering techniques. Even for single-shade restorations, understanding the opacity of your chosen composite helps predict the final result.
  • Use a shade guide from your composite manufacturer: Generic VITA shade guides may not precisely match the actual appearance of a specific composite product. The manufacturer’s custom shade guide, if available, provides a more accurate preview.

Single-Shade and Simplified Systems

Several composite manufacturers have recently introduced single-shade or simplified shade systems that claim to match a wide range of tooth colors using structural color technology. These products use specialized filler configurations to interact with surrounding tooth structure and take on its apparent shade. While they may not perfectly replace multi-shade layering for highly esthetic anterior cases, they can dramatically simplify shade matching for routine restorations and are worth evaluating for your practice.

Bonding Systems: The Foundation of Composite Success

No discussion of dental composites is complete without addressing adhesive systems. The bond between composite and tooth structure is what makes modern restorative dentistry possible, and selecting the right bonding system is just as important as choosing the right composite.

Total-Etch (Etch-and-Rinse) Systems

Total-etch systems use phosphoric acid to etch both enamel and dentin, followed by a primer and adhesive (3-step) or a combined primer-adhesive (2-step). They provide the strongest enamel bonds and remain the gold standard for enamel adhesion.

Self-Etch Systems

Self-etch adhesives use acidic primers that simultaneously condition and prime the tooth surface. They are less technique-sensitive than total-etch systems and reduce the risk of post-operative sensitivity in dentin, though their enamel bond strength may be somewhat lower.

Universal Adhesives

Universal adhesives can be used in total-etch, self-etch, or selective-etch mode, giving clinicians maximum flexibility. Most current evidence supports selective etching, where phosphoric acid is applied to enamel only, followed by the universal adhesive on both enamel and dentin.

You can find a curated selection of composites and bonding agents at Pixel Dental Supply’s composites and bonding category, making it easy to build a complete restorative system from a single source.

Choosing the Right Composite for Your Practice

With so many options available, here is a practical framework for selecting composites that will serve your practice well.

  • Start with a universal nanohybrid or nanofill: Choose one high-quality composite as your primary material for both anterior and posterior restorations. This simplifies inventory management and lets you develop deep familiarity with the material’s handling characteristics.
  • Add a bulk-fill for deep posteriors: A bulk-fill composite or flowable can significantly reduce chair time for Class II and large Class I restorations. Choose one that is compatible with your primary composite for capping layers.
  • Keep a flowable on hand: A flowable composite serves as a liner, a small-restoration material, and a repair material. One or two shades are usually sufficient.
  • Match your bonding system to your clinical philosophy: If you prefer maximum bond strength and do not mind the technique sensitivity, go with a total-etch system. If you prioritize simplicity and reduced sensitivity, a universal adhesive in selective-etch mode is an excellent choice.
  • Evaluate before committing: Most manufacturers offer sample kits or trial syringes. Test a new composite on several cases before purchasing a full inventory to ensure it meets your expectations for handling, shade matching, and polishability.

Proper Storage and Handling of Composite Materials

Composite materials are sensitive to light and temperature extremes. Proper storage protects your investment and ensures consistent clinical results.

  • Store at room temperature: Most composites should be stored between 2-28 degrees Celsius. Some clinicians refrigerate composites to extend shelf life, but allow the material to reach room temperature before use to ensure proper handling consistency.
  • Protect from ambient light: Composites are light-sensitive by design. Keep syringes and compules in their original packaging or opaque containers when not in use. Never leave composite exposed to the operatory light.
  • Check expiration dates: Expired composites may exhibit altered handling properties, reduced bond strength, or inconsistent curing. Rotate your stock so that older materials are used first.
  • Replace caps immediately after dispensing: Leaving a syringe uncapped for even a few minutes can cause partial polymerization of the surface material, affecting the quality of subsequent dispensing.

Upgrade Your Restorative Materials Today

The dental composite you choose directly influences your restoration quality, your efficiency, and your patients’ satisfaction. By understanding the differences between composite types, mastering curing technique, and developing a systematic approach to shade selection, you position yourself to deliver exceptional results with every restoration.

Explore the full range of composite and bonding materials at Pixel Dental Supply to find products that match your clinical needs and budget. From universal nanohybrids to bulk-fill systems and advanced bonding agents, Pixel Dental Supply offers trusted materials at competitive prices, shipped directly to your practice. Visit the shop to see the complete catalog and take advantage of current pricing.

Frequently Asked Questions

How long do dental composite restorations typically last?

The longevity of a composite restoration depends on multiple factors, including the material used, the size and location of the restoration, the patient’s oral hygiene, and occlusal forces. Current research suggests that well-placed composite restorations in posterior teeth have a median survival of 7 to 12 years, with smaller restorations generally lasting longer. Anterior composites often last 5 to 10 years before esthetic concerns like staining or marginal discoloration prompt replacement. Proper technique, especially thorough curing and good bonding protocol, is the single most significant factor in restoration longevity.

Can I use the same composite for both anterior and posterior teeth?

Yes. Modern nanofill and nanohybrid composites are designed to perform well in both anterior and posterior applications. Their filler technology provides adequate strength for posterior occlusal loads while also delivering the polishability and esthetics needed for visible anterior restorations. Using a single universal composite simplifies your inventory and allows you to develop deep familiarity with the material’s handling, shade behavior, and finishing characteristics. However, some clinicians still prefer specialized materials for highly esthetic anterior cases, such as layered Class IV restorations.

What causes white lines or discoloration at composite margins?

Marginal discoloration typically results from microleakage at the interface between the composite and the tooth structure. Common causes include inadequate bonding technique, contamination of the preparation with saliva or blood before bonding, insufficient curing of the adhesive or composite, and polymerization shrinkage stress that exceeds the bond strength. To minimize marginal discoloration, ensure thorough isolation, follow the bonding protocol precisely, cure each increment completely, and consider using a low-shrinkage composite for large restorations. Selective enamel etching before applying a universal adhesive can also improve marginal seal.

Is bulk-fill composite as strong as conventional layered composite?

Current evidence indicates that reputable bulk-fill composites achieve mechanical properties comparable to conventional composites when used according to the manufacturer’s instructions. Laboratory studies show similar flexural strength, compressive strength, and wear resistance. Clinical studies with follow-up periods of up to five years have not found significant differences in failure rates. The primary advantage of bulk-fill composites is efficiency rather than strength. They reduce chair time without compromising restoration quality, making them particularly valuable for large posterior restorations where multiple layering steps would otherwise be required.

Best Dental Burs for General Dentistry: A Complete Buying Guide

Dental burs are among the most frequently used instruments in any general dentistry practice. Whether you are preparing a cavity, adjusting a crown, or finishing a composite restoration, the right bur can make the difference between an efficient, precise procedure and one that wastes time and compromises results. Yet with hundreds of shapes, sizes, grits, and materials on the market, choosing the right burs for your operatory can feel overwhelming.

This guide breaks down everything you need to know about selecting dental burs for general practice, from the fundamental differences between carbide and diamond to the specific shapes that belong in every clinician’s starter set. By the end, you will have a clear framework for stocking your practice with the burs that deliver the best performance and value.

Carbide Burs vs. Diamond Burs: Understanding the Core Difference

The two dominant categories of dental burs are tungsten carbide burs and diamond burs. Each has distinct cutting characteristics, and most general dentists rely on both types daily.

Tungsten Carbide Burs

Carbide burs feature precisely machined fluted blades made from tungsten carbide, one of the hardest synthetic materials available. Their cutting action works by shearing tooth structure and restorative materials in a controlled, chip-producing manner.

  • Smooth cutting action: Carbide burs produce less vibration than diamond burs, giving clinicians excellent tactile feedback during cavity preparation.
  • Clean margins: Because they cut by shearing rather than grinding, carbide burs leave smoother preparation walls and margins, which is critical for the longevity of indirect restorations.
  • Versatile material removal: Carbide burs excel at removing old amalgam, trimming acrylic temporaries, and adjusting metal frameworks.
  • Longer functional life: High-quality carbide burs can be sterilized and reused multiple times before the blades dull, making them cost-effective over time.

Common applications include caries excavation, cavity preparation, removal of existing restorations, and finishing and polishing composite restorations.

Diamond Burs

Diamond burs are coated with industrial diamond particles bonded to a metal shank. Instead of cutting with blades, they grind through tooth structure using abrasive action.

  • Aggressive material removal: Diamond burs remove enamel and porcelain faster than carbide burs, making them the go-to choice for crown preparations and veneer preps.
  • Variety of grits: Diamond burs come in coarse, medium, fine, and superfine grits, allowing clinicians to move from bulk reduction to final finishing with the same shape profile.
  • Ideal for hard tissues: When cutting through enamel or ceramic materials, diamond burs maintain their efficiency better than carbide alternatives.
  • Excellent for crown and bridge work: The aggressive cutting and variety of available shapes make diamond burs indispensable for prosthodontic preparations.

Diamond burs are typically the first choice for enamel reduction, crown and bridge preparation, porcelain adjustment, and initial tooth preparation before switching to carbide for finishing.

Essential Bur Shapes Every General Dentist Should Stock

Dental burs come in dozens of shapes, but a relatively small set covers the vast majority of procedures in general practice. Here are the shapes that belong in every operatory.

Round Burs

Round burs are the workhorses of caries removal. Available in sizes from 1/4 round up to #8 round, they are designed to access decay and excavate soft dentin without creating unnecessary undercuts. A #2 round carbide bur is arguably the single most used bur in general dentistry. Keep a range of sizes on hand for different cavity depths and access requirements.

Pear-Shaped Burs

Pear-shaped burs combine the access characteristics of a round bur with a slightly elongated profile. They are excellent for creating initial access points in cavity preparations and for undercut-free bulk removal of tooth structure. The #330 and #331 pear-shaped carbide burs are staples in most practices.

Tapered Fissure Burs

Available in both flat-end (e.g., #169, #170) and round-end (e.g., #1171, #1172) configurations, tapered fissure burs are essential for creating divergent walls in crown preparations. The slight taper matches the ideal draw angle for indirect restorations, and the round-end versions help avoid sharp internal line angles that concentrate stress.

Flat-End Cylinder Burs

Also called straight fissure burs (e.g., #57, #557), these create flat floors and parallel walls. They are commonly used in Class II preparations and for creating flat reduction surfaces in crown preps. The flat end ensures a uniform preparation depth.

Flame-Shaped and Needle Burs

These fine, pointed burs are used for detail work: finishing interproximal margins, creating retention grooves, and refining subgingival margins on crown preparations. A fine-grit diamond flame bur is invaluable for margin finishing.

Football-Shaped Burs

Football or egg-shaped burs are commonly used for occlusal adjustment, smoothing concave surfaces, and contouring composite restorations on occlusal surfaces. Their rounded profile conforms naturally to the anatomy of fossae and grooves.

Finishing Burs

Multi-fluted carbide finishing burs (typically 12 or 30 flutes) are designed specifically for smoothing and polishing composite restorations. They come in the same shapes as standard carbide burs but produce a much finer surface texture. A set of 12-flute finishing burs in round, egg, and flame shapes will handle most composite finishing needs.

Understanding Bur Shank Types: FG, RA, and HP

Burs are manufactured with different shank configurations to fit different handpieces. Using the wrong shank type is not just inconvenient; it can be dangerous.

  • FG (Friction Grip): The most common shank type in general dentistry. FG burs have a smooth, small-diameter shank (1.6mm) designed for high-speed handpieces. The vast majority of your operative and prosthodontic burs will be FG shanks.
  • RA (Right Angle): Also called latch-type shanks, RA burs have a notched shank (2.35mm) that locks into slow-speed contra-angle handpieces. Round carbide burs for caries excavation are commonly used in RA shanks for better control at lower speeds.
  • HP (Handpiece): HP shanks (3.17mm) fit straight-nose low-speed handpieces and are primarily used in the dental laboratory. They are less common in chairside practice but useful for adjusting appliances and prosthetics.

When ordering, always verify the shank type matches your handpiece system. Most online dental supply stores, including Pixel Dental Supply’s bur collection, clearly label shank types for easy identification.

Grit Selection for Diamond Burs

Diamond burs are categorized by the size of the diamond particles bonded to their surface. The grit determines how aggressively the bur cuts and the surface finish it produces.

  • Super Coarse (Black Band): 150+ microns. Used for rapid bulk reduction, typically in crown preparations where significant tooth structure must be removed quickly.
  • Coarse (Green Band): 125-150 microns. A good general-purpose grit for initial tooth preparation. Removes material efficiently while maintaining reasonable control.
  • Medium (Blue Band or no band): 100-120 microns. The standard grit for most restorative preparations. Balances cutting efficiency with surface quality.
  • Fine (Red Band): 45-80 microns. Used for margin finishing and smoothing preparation walls after initial reduction. Essential for achieving clean, definable margins.
  • Superfine (Yellow Band): 10-30 microns. Used for final polishing and ultra-smooth finishing. Often used in cosmetic procedures where surface quality is paramount.

A practical approach for general practice is to stock medium-grit diamonds for everyday preparations and keep a selection of fine-grit diamonds for margin refinement. Reserve coarse and superfine grits for specific procedural needs.

Single-Use vs. Multi-Use: Making the Right Choice

The debate between single-patient-use and multi-use burs involves considerations of cost, infection control, and clinical performance.

The Case for Single-Use Burs

Single-use diamond burs perform at peak sharpness for every patient, since diamond burs lose cutting efficiency after use. They eliminate cross-contamination risk and reduce the labor cost of cleaning, inspecting, and sterilizing burs. For high-volume practices, single-use burs can actually reduce overall costs when you factor in reprocessing time.

The Case for Multi-Use Burs

High-quality carbide burs can maintain their cutting edges through multiple sterilization cycles, making them more economical on a per-use basis. Multi-use burs are also better for the environment, generating less medical waste. The key is implementing a reliable inspection protocol: discard any bur that shows visible wear, bent flutes, or reduced cutting efficiency.

Many practices adopt a hybrid approach, using single-patient-use diamond burs for preparations and reusable carbide burs for caries removal and finishing procedures.

How to Evaluate Bur Quality Before You Buy

Not all dental burs are created equal. Here are the quality indicators that separate reliable burs from subpar products.

  • Concentricity: A high-quality bur should spin with minimal runout. Eccentric burs cause vibration, reduce control, and produce rough preparation surfaces.
  • Shank fit: The bur should seat securely in your handpiece without excessive play. Loose-fitting burs are both a safety hazard and a clinical liability.
  • Diamond particle distribution: On diamond burs, the particles should be evenly distributed across the working surface. Bare spots or clumping indicate poor manufacturing.
  • Flute consistency: On carbide burs, the flutes should be uniform in depth and spacing. Inconsistent flutes produce uneven cutting and premature dulling.
  • Cutting efficiency on first use: A new bur should cut effortlessly. If a brand-new bur feels sluggish or requires excessive pressure, the quality is suspect.

Reputable dental supply companies provide burs from manufacturers that meet ISO standards and undergo quality testing. When you shop for dental burs at Pixel Dental Supply, you can trust that the products have been vetted for clinical reliability.

Building Your Practice’s Bur Inventory

A well-organized bur inventory prevents procedure delays and ensures you always have the right tool at hand. Here is a recommended starter inventory for a general dentistry operatory.

Carbide Burs (Reusable)

  • #1/4, #1, #2, #4, #6 round burs (caries excavation)
  • #245, #330, #331 pear-shaped burs (cavity preparation)
  • #56, #57, #557, #558 straight fissure burs (Class II preparations)
  • #169, #170, #171 tapered fissure burs (crown preparation)
  • 12-flute finishing burs in assorted shapes (composite finishing)

Diamond Burs (Single-Use or Rotational)

  • Medium-grit round-end tapered diamonds in 2-3 sizes (crown preps)
  • Medium-grit flat-end tapered diamonds in 2-3 sizes (crown preps)
  • Fine-grit flame diamonds (margin finishing)
  • Medium-grit football diamonds (occlusal reduction)
  • Fine-grit needle diamonds (interproximal finishing)

Keep a minimum of five of each frequently used bur in stock, and implement a reorder system that triggers when inventory drops below that threshold. This prevents the frustrating experience of reaching for a bur mid-procedure and finding the block empty.

Storage and Sterilization Best Practices

Proper bur management extends the life of reusable burs and ensures patient safety.

  • Organize by procedure type: Use labeled bur blocks for specific procedures (e.g., crown prep kit, composite kit, endo access kit). This speeds up operatory setup and reduces searching.
  • Clean before sterilization: Ultrasonic cleaning removes debris from flutes and diamond coatings more effectively than manual scrubbing. An enzymatic cleaner designed for instruments further improves results.
  • Inspect after cleaning: Use magnification to check for worn diamond coatings, bent shanks, or dulled carbide flutes. Discard any bur that does not pass inspection.
  • Sterilize according to manufacturer guidelines: Most dental burs are compatible with standard steam autoclaving. Verify that your sterilization parameters meet the manufacturer’s recommendations.
  • Replace on a schedule: Even burs that appear intact lose cutting efficiency over time. Establish a maximum number of sterilization cycles for each bur type and track usage accordingly.

Shop Smart: Getting the Best Value on Dental Burs

Dental burs represent a recurring expense that can add up quickly, especially in a busy practice. Here are strategies for managing costs without compromising quality.

  • Buy in bulk: Multi-packs and bulk quantities offer significant per-unit savings. If you know which burs you use most, ordering in larger quantities reduces your cost per bur.
  • Try reputable alternative brands: Premium-brand burs are not always superior to well-manufactured alternatives. Many dental supply companies offer high-quality burs at a fraction of the name-brand price.
  • Consolidate your supplier: Ordering all your burs from a single reliable source simplifies inventory management and may qualify you for volume discounts.
  • Order online: Online dental supply retailers typically offer lower prices than traditional sales-rep-based distributors due to lower overhead. Pixel Dental Supply offers competitive pricing on a wide range of dental burs with the convenience of online ordering.

Ready to Stock Your Operatory?

Choosing the right dental burs is a decision that directly affects your clinical outcomes, procedural efficiency, and bottom line. By understanding the differences between carbide and diamond burs, stocking the essential shapes for general dentistry, and implementing smart purchasing and maintenance practices, you can ensure that your practice is always prepared for any procedure that comes through the door.

Browse the complete selection of dental burs at Pixel Dental Supply to find high-quality carbide and diamond burs at competitive prices. Whether you need to restock a single favorite shape or build an entirely new bur inventory, Pixel Dental Supply has you covered with fast shipping and dependable products that meet the demands of everyday general dentistry.

Frequently Asked Questions

How often should I replace my dental burs?

There is no universal replacement schedule because bur longevity depends on the material being cut, the handpiece speed, and how much pressure is applied. As a general guideline, single-patient-use diamond burs should be discarded after each patient. Reusable carbide burs should be inspected under magnification after each sterilization cycle and discarded when flutes appear rounded or cutting efficiency noticeably decreases. Many practices find that carbide burs last between 5 and 15 uses before performance drops below an acceptable threshold.

Can I use the same bur for both enamel and dentin?

Yes, many burs are designed to cut through both enamel and dentin, though the cutting characteristics differ. Diamond burs are generally more efficient on enamel due to their abrasive action, while carbide burs offer superior control in dentin. A common workflow is to use a diamond bur for initial enamel penetration and a carbide round bur for dentin caries excavation. Matching the bur type to the tissue you are cutting improves both efficiency and tactile feedback.

What is the difference between FG and RA burs, and does it matter clinically?

FG (Friction Grip) burs are designed for high-speed handpieces and have a smooth 1.6mm shank. RA (Right Angle) burs have a latch-type 2.35mm shank for slow-speed contra-angle handpieces. The clinical difference is significant: high-speed FG burs are used for cutting tooth structure and preparing restorations, while slow-speed RA burs provide greater control for caries excavation and finishing. Using the wrong shank type in a handpiece can cause the bur to dislodge or wobble, creating a safety risk.

Are cheaper dental burs safe to use on patients?

Price alone does not determine bur quality or safety. Many affordable bur brands manufacture products that meet ISO 7786 and ISO 6360 standards, the same benchmarks that premium brands must satisfy. The key is to purchase from a reputable supplier that sources from verified manufacturers. Look for consistent concentricity, secure shank fit, and reliable cutting performance. If a low-cost bur meets these criteria, it is perfectly safe and effective for clinical use. Pixel Dental Supply carries cost-effective bur options that are vetted for quality and clinical reliability.